

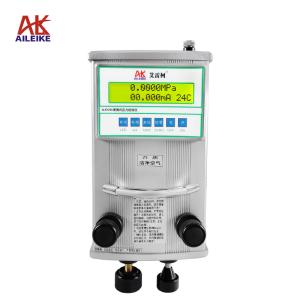
Operating procedures for calibrating the positive and negative pressure ranges of a pressure transmitter (HART protocol)
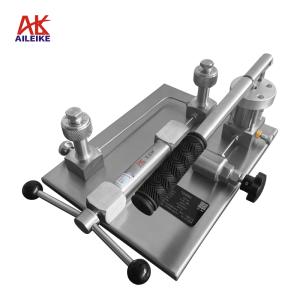
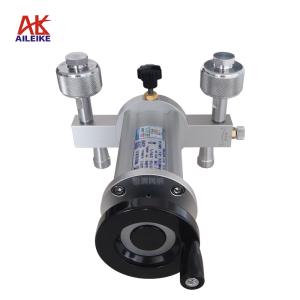
The pressure transmitter (HART protocol) is used for industrial pressure measurement and control, collecting on-site pressure and outputting a 4~20mA current signal. Changes in the environment and medium can cause zero drift and output linear deviation, resulting in inaccurate measurement and control of the entire system. This procedure uses the Air-Lac ALKB602 portable air pressure pump, ALKC400T precision digital pressure gauge, and ALK475TREX (Chinese version) HART handheld operator integrated pressure calibration device to check wiring under standard temperature and humidity conditions, and conduct full-range calibration of positive and negative pressure for the pressure transmitter. The pressure is raised and lowered step by step, zero and span adjustments are performed, the accuracy of current output is verified, and the instrument's return difference characteristics are tested. The transmitter calibration is standardized to ensure that the measurement data is true and reliable.
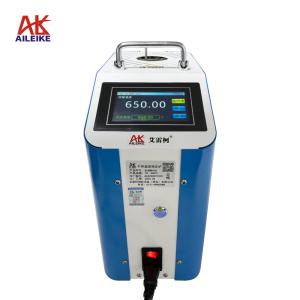
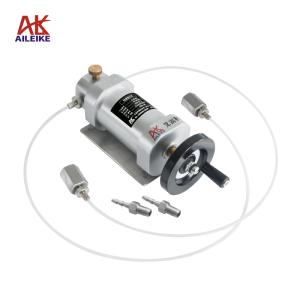
1. Calibration tool for pressure transmitter (HART protocol)
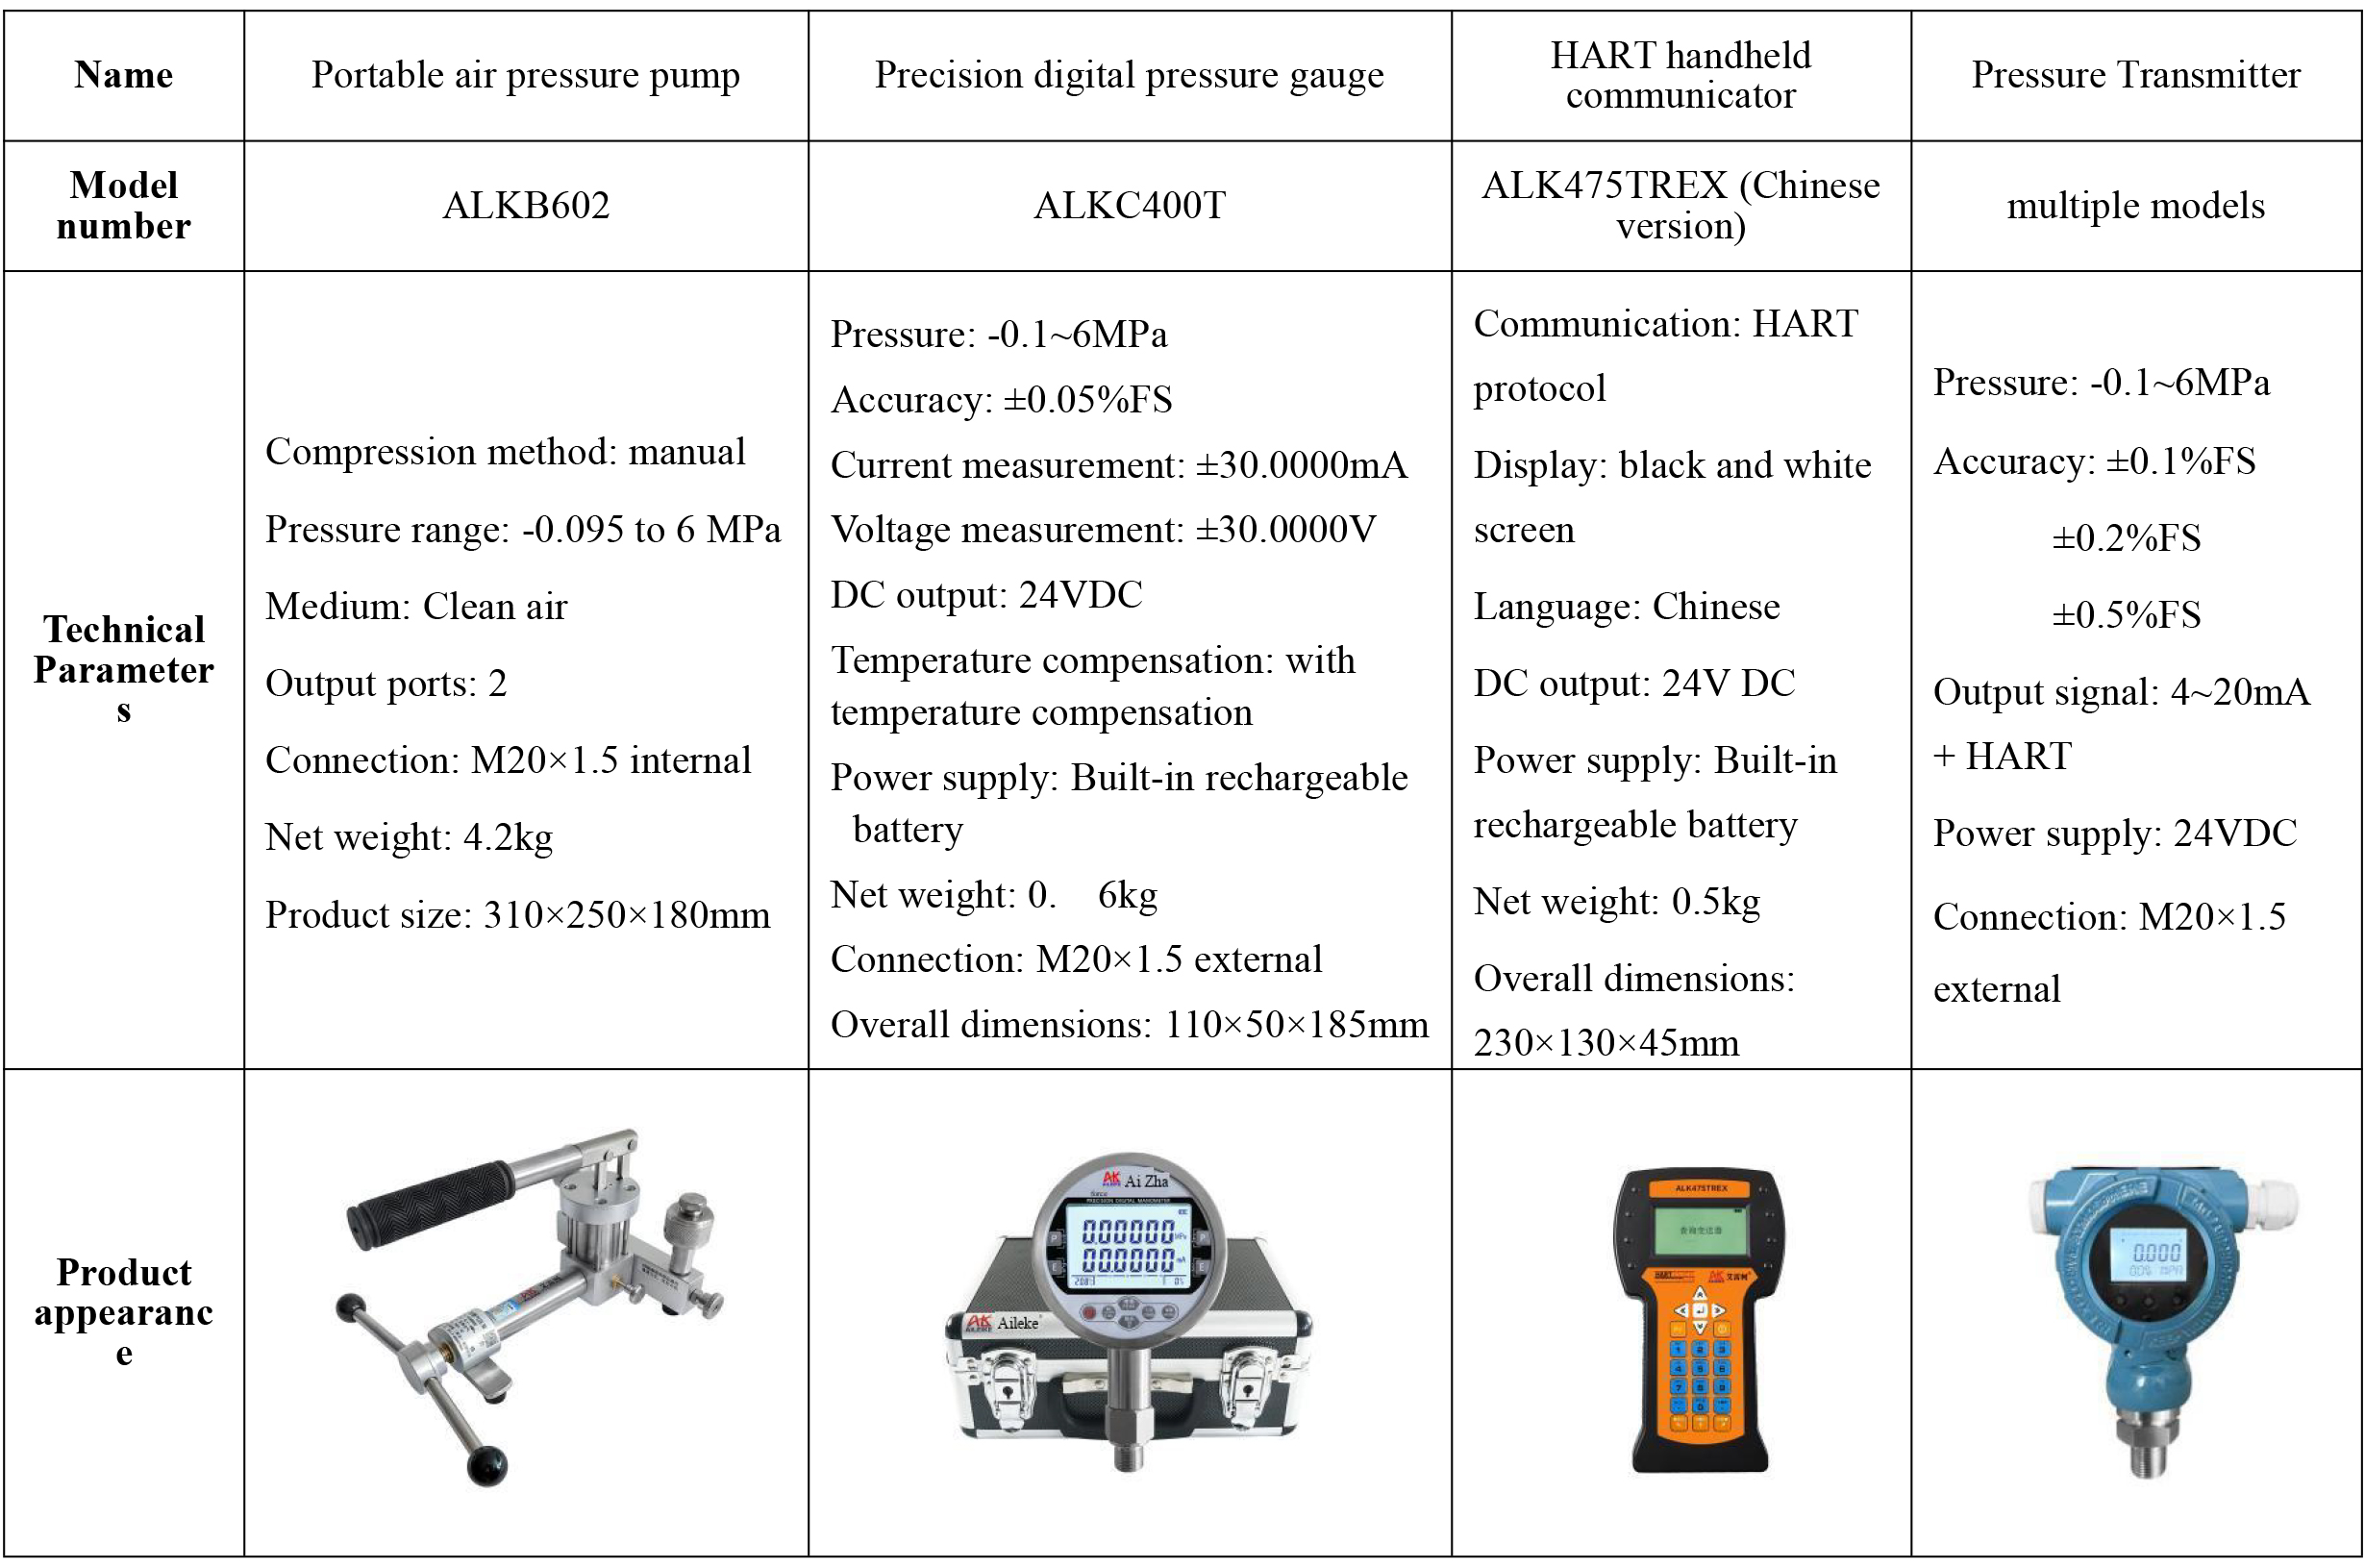
The entire verification process must strictly adhere to the current metrological technical specifications, primarily based on JJG 882-2019 "Pressure Transmitter". This standard is applicable to the verification, periodic calibration, and in-service inspection of pressure transmitters, regulating the indication error, return difference, and repeatability of the transmitters.
II. Detailed Explanation of Operational Procedures
(I) Preliminary preparations
1. Environmental requirements
The temperature should be controlled at (20±2)℃, with a relative humidity of ≤85%RH, and there should be no condensation. Ensure that the site is free from vibration, dust, and corrosive gases.
2. Tool connection
• Connect the pressure transmitter and the Precision digital pressure gauge alkc400T to the ALKB602 output port seal.
• Wiring method 1 (precision digital pressure gauge with 24V power supply):
(1) Wiring of the red test line: Insert one end into the 24V interface of the standard meter, and clamp the other end onto the positive terminal of the transmitter
(2) Connect the transmitter's negative terminal to a 250Ω resistor
(3) Black test line wiring: Insert one end into the current interface of the standard meter, and clamp the other end onto one side of a 250Ω resistor
(4) Wiring of the handheld communicator communication cable: one end is plugged into the communication interface of the handheld communicator, and the other end is clamped to both ends of a 250Ω resistor
(5) Complete the wiring to form a closed circuit
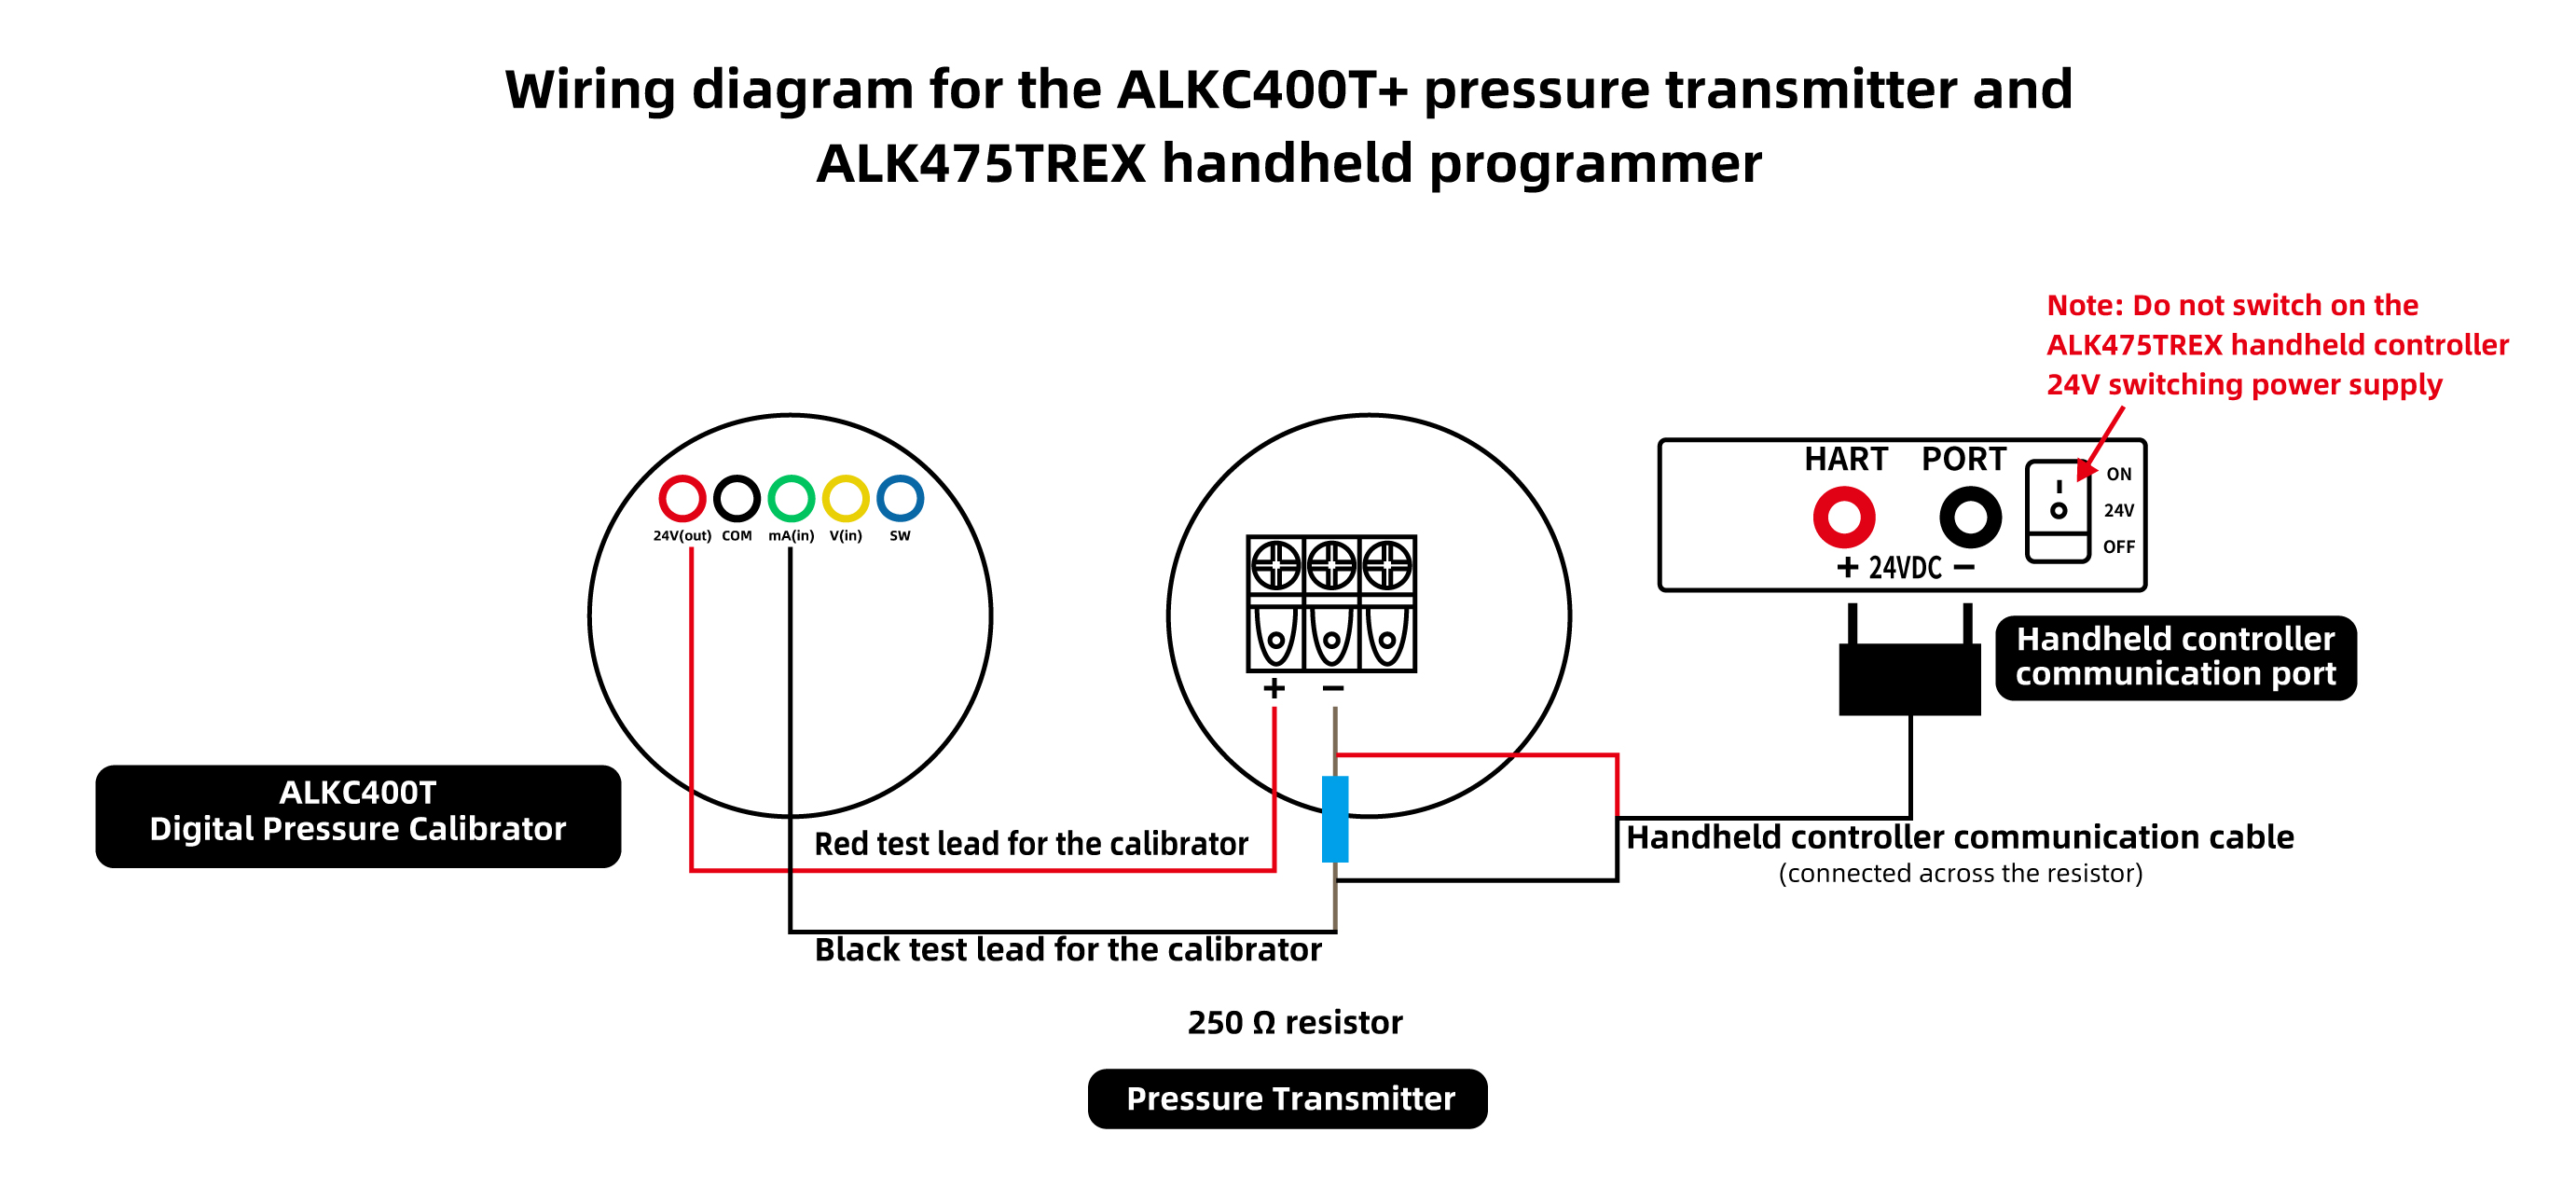
Wiring diagram (I)
• Wiring method 2 (ALK475TREX handheld device 24V power supply):
(1) Wiring of the red test line: Insert one end into the current interface of the standard meter, and clamp the other end onto the negative terminal of the transmitter
(2) Wiring of black test line: Insert one end into the common terminal interface of the standard meter
(3) Wiring of the handheld communicator communication cable: Plug one end into the handheld communicator communication interface, clamp the red clip onto the transmitter positive terminal, and clamp the black clip together with the clip of the black test cable
(4) Complete the wiring to form a closed circuit, and turn on the 24V switch power supply of the ALK475TREX handheld device
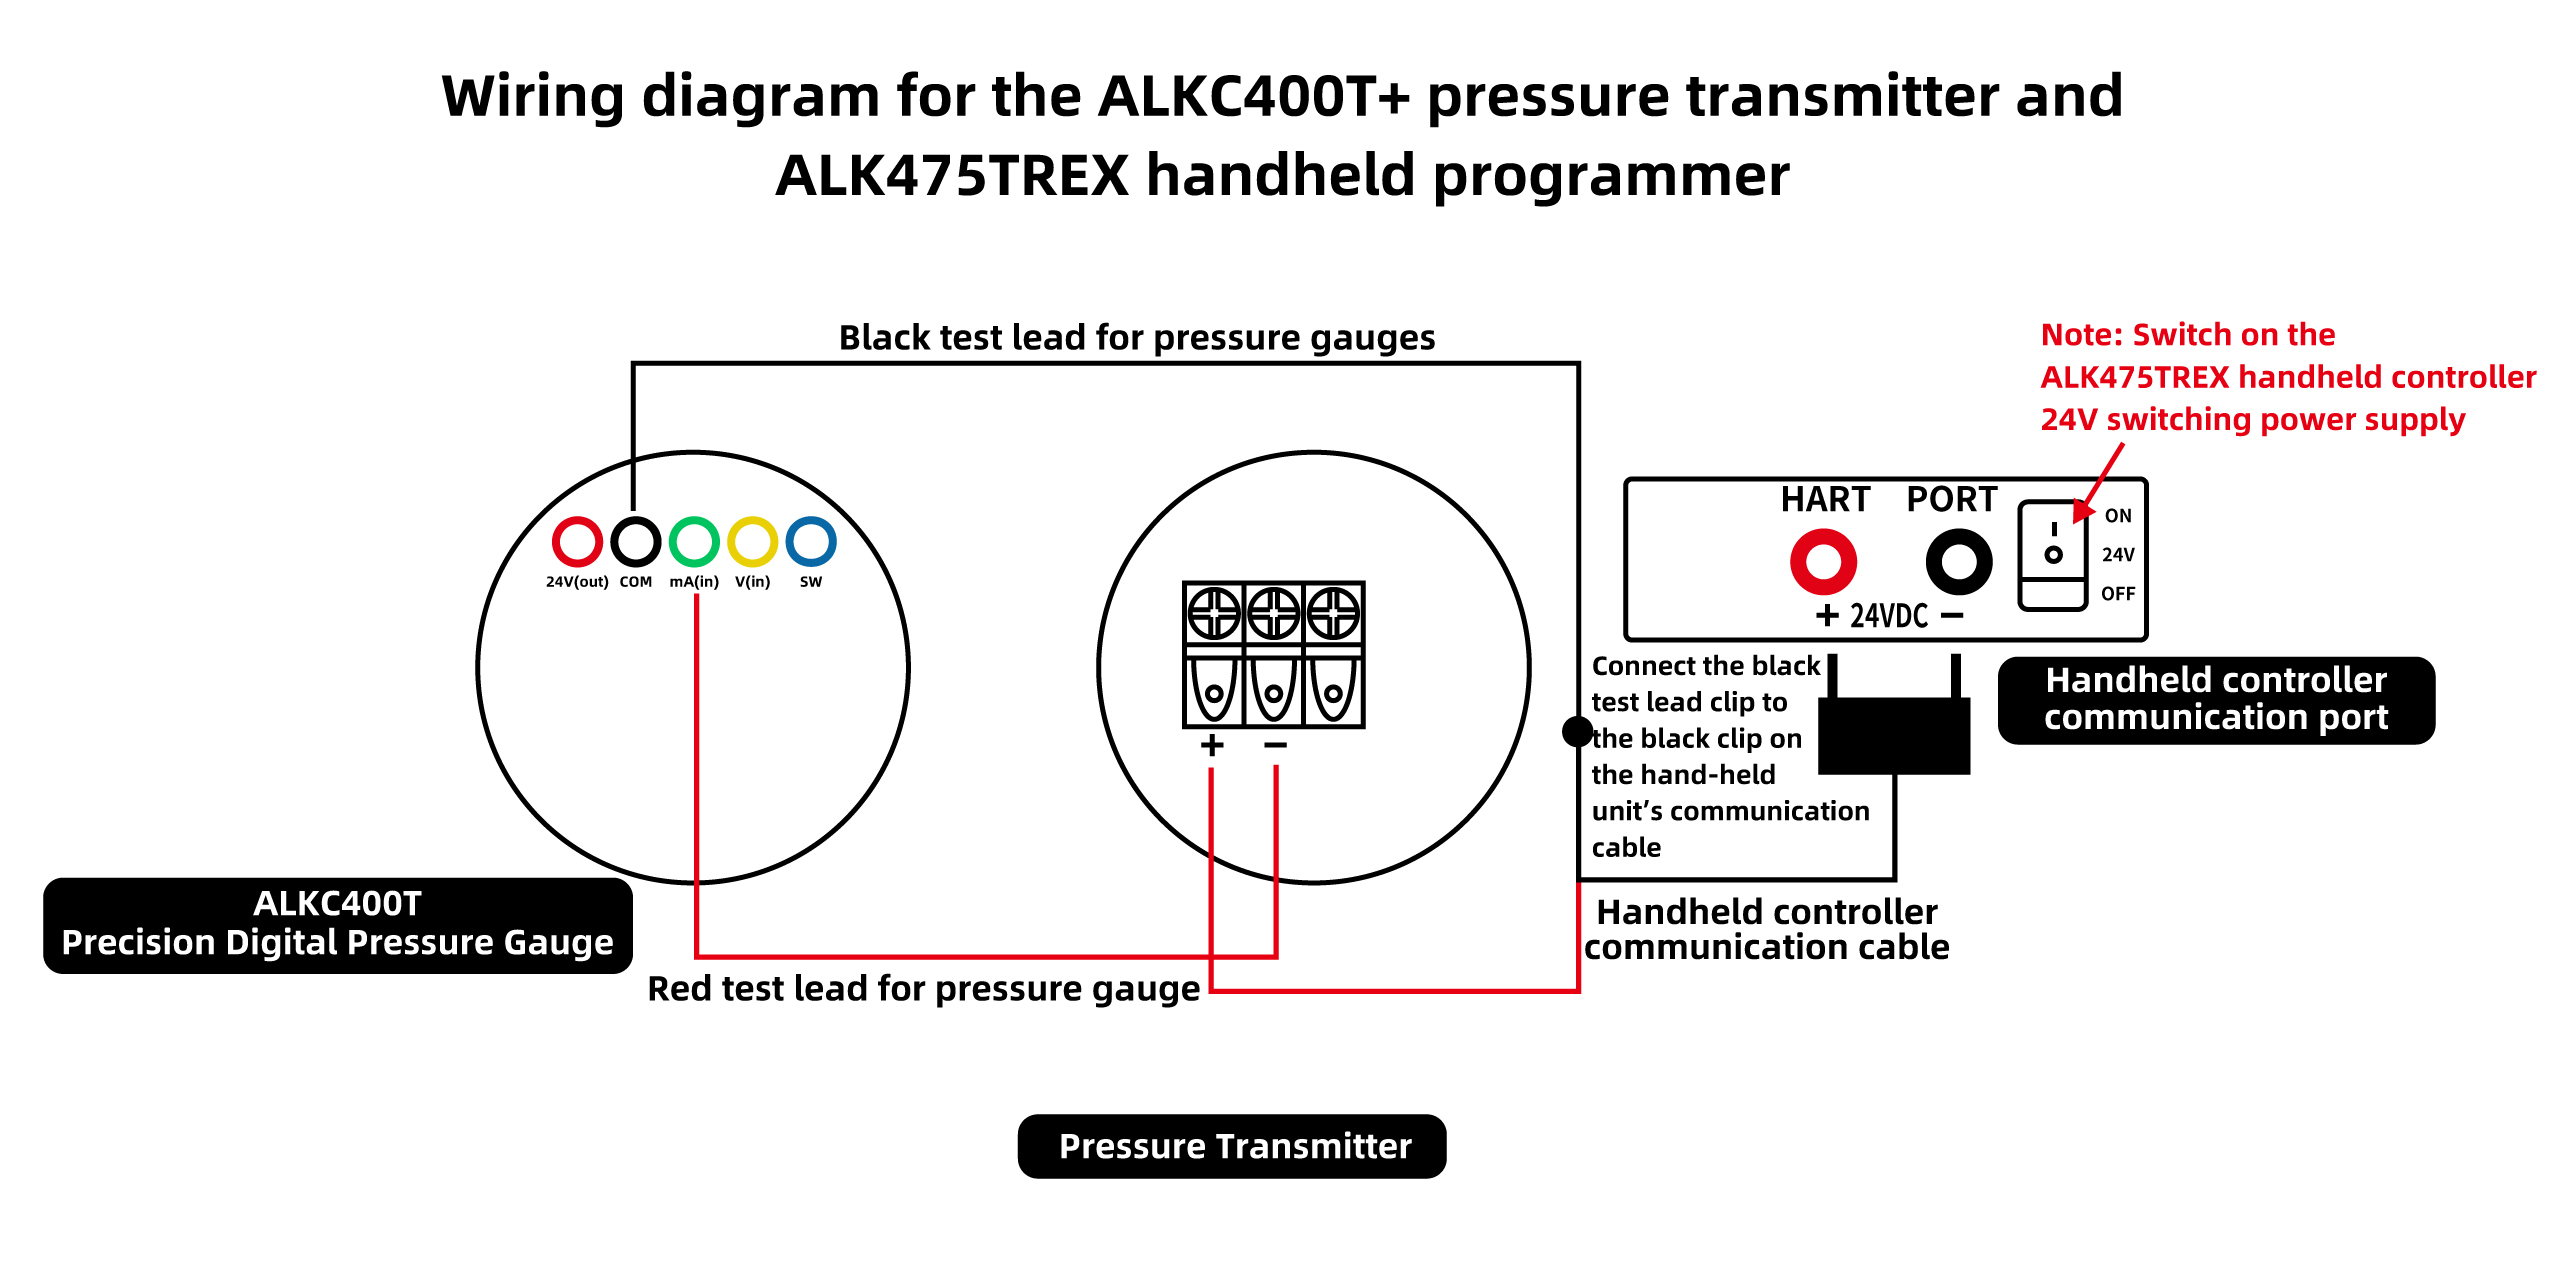
Wiring diagram (II)
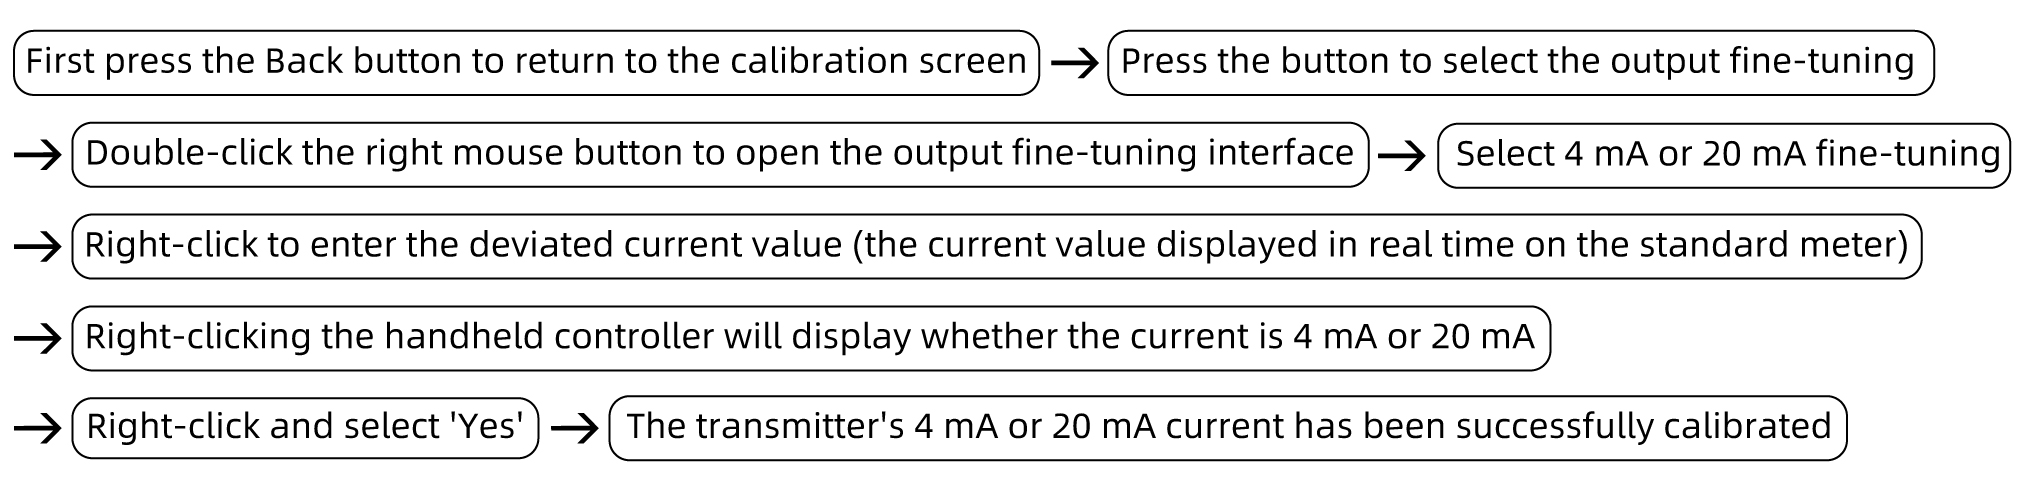
• If the transmitter indicates a value other than 0 under current atmospheric pressure, and the standard meter measures a deviation in the transmitter's current value of 4mA, then take out the HART handheld device to calibrate the transmitter's zero point and current.
3. Specific calibration steps for the handheld device
(1) Calibrate the transmitter zero point
Turn on the handheld device, and the handheld device has successfully communicated with the pressure transmitter
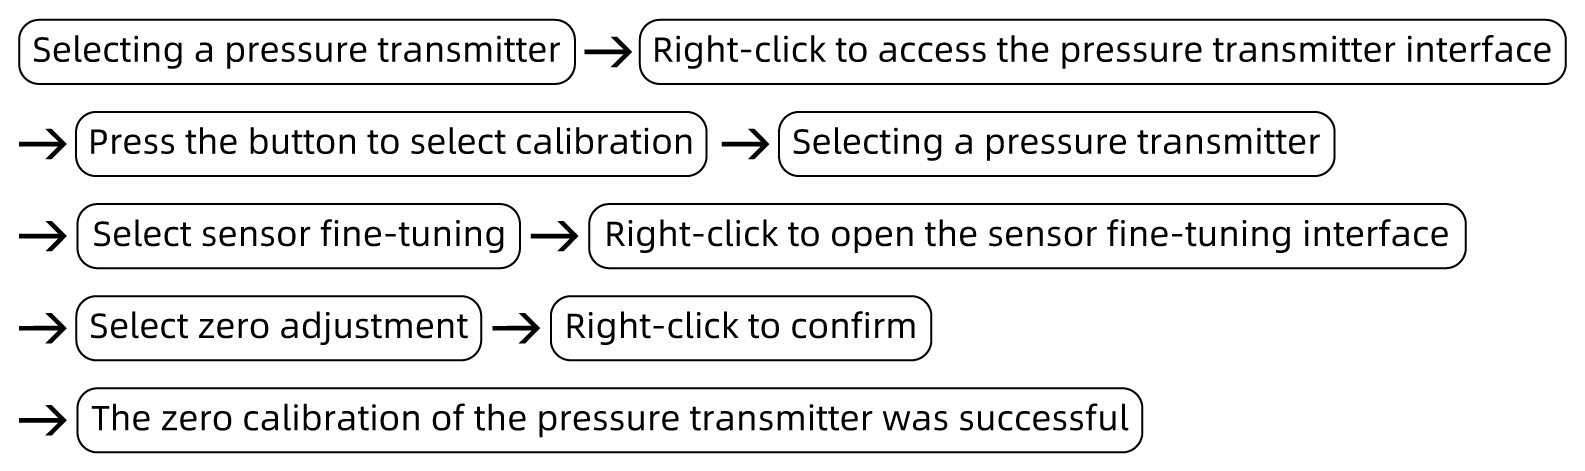
(2) Calibrate the transmitter current value measured by the pressure gauge to 4mA or 20mA
(II) Calibration process of positive pressure verification for pressure transmitter (HART protocol)
1. Voltage boost calibration process
First, open the ALKB602 vent valve, push the switch valve inward, and avoid switching under pressure. Adjust the fine adjustment knob counterclockwise to the appropriate position, and then close the vent valve.
• Use a lever to apply pressure, stop when the pressure reaches the value to be verified, and then use fine adjustment to turn clockwise to the verification point of 1.5 MPa. If the pressure value measured by the transmitter deviates from 1.5 MPa, and the current value of the pressure transmitter measured by the standard meter is also 8 mA, take out the handheld device to calibrate the pressure and current values.
• Calibrate transmitter pressure value:
Select either low-range trimming or high-range trimming. When the pressure value measured by the transmitter is below 1.5 MPa, select low-range trimming; when the pressure value is above 1.5 MPa, select high-range trimming. Then, press the right button, enter the pressure value of 1.5 MPa, and finally press the right button to confirm. The pressure value and current value will be calibrated successfully simultaneously.
• Then apply pressure using the lever, stopping when the pressure reaches around the verification value. Next, use fine adjustment to reach the verification point of 3 MPa. The current value should be 12 mA. If there is a deviation between the pressure value of the transmitter and the current value measured by the standard meter, take out the handheld device to calibrate the pressure and current values.
• For the same operation, directly use the micro-adjustment to turn clockwise to 4.5MPa and 6MPa. The current values should be 16mA and 20mA. If there is an error, calibrate with a handheld device (as per the above operation).
2. Pressure reduction calibration process
• Slowly open the vent valve, release pressure until it reaches around the pressure value that needs to be verified, then close the vent valve. Use a fine adjustment to reduce pressure counterclockwise until it reaches a pressure value of 4.5 MPa. The current value measured by the standard meter for the pressure transmitter should be 16 mA. If there is a deviation, the handheld device needs to be taken out to calibrate the pressure and current values.
• For the same operation adjusted to verification points of 3MPa and 1.5MPa, the corresponding current values should be 12mA and 8mA. In case of any error, calibration is required using a handheld device (as per the above operation).
Record the correspondence between pressure and current at each point, and verify whether the return difference (current difference at the same point during pressure increase and decrease) meets the requirement (≤0.05%FS).
3. Pressure relief process
Open the vent valve, gradually release the pressure inside the pipeline, and when the pressure drops to 0, the measurement is complete.
(III) Calibration process of negative pressure verification for pressure transmitter (HART protocol)
1. Voltage boost calibration process
• Open the vent valve and pull the switching valve outwards. Do not switch under pressure. Adjust the fine adjustment clockwise to the appropriate position, and then close the vent valve.
• Use a lever to perform vacuum pumping, and pump the vacuum to around the verification value. Then, use a fine adjustment tool to adjust counterclockwise to the verification point of -0.02 MPa. The pressure value measured by the transmitter deviates from -0.02 MPa, and the current value of the pressure transmitter measured by the standard meter, 16.8 mA, also deviates. Take out the handheld device to calibrate the pressure and current values.
• Calibrate transmitter pressure value:
Select low-range segment trimming or high-range segment trimming. When the pressure value measured by the transmitter is lower than -0.02 MPa, select low-range segment trimming. When the pressure value is higher than -0.02 MPa, select high-range segment trimming. Then press the right button, enter the pressure value as -0.02 MPa, and finally press the right button to confirm. The pressure value and current value are calibrated successfully at the same time.
• For the same operation, when pumping to pressure values of -0.04MPa, -0.06MPa, -0.08MPa, and -0.095MPa, the current values should be 13.4mA, 9.9mA, 6.5mA, and 4mA respectively. In case of any errors, calibration with a handheld device is required (as per the above operation).
2. Pressure relief calibration process
• Open the vent valve slowly, release pressure until it reaches around the pressure value that needs to be verified, then close the vent valve. Use a micro-adjustment to decrease pressure counterclockwise until it reaches a pressure value of -0.08 MPa. The current value measured by the standard meter for the pressure transmitter should be 6.5 mA. If there is a deviation, the handheld device should be taken out to calibrate the pressure and current values.
• For the same operation, adjust the vacuum values to -0.06MPa, -0.04MPa, and -0.02MPa, and the corresponding current values should be 9.9mA, 13.4mA, and 16.8mA respectively. In case of any errors, calibrate with a handheld device (as per the above operation).
Record the correspondence between pressure and current at each point, and verify whether the return difference (current difference at the same point during pressure increase and decrease) meets the requirement (≤0.05%FS).
3. Pressure relief process
Open the vent valve, gradually release the pressure inside the pipeline until it reaches 0, and then the measurement is complete.
III. Precautions
Standardized use
• Operations should follow standard procedures. The ALKB602 portable air pressure pump should be pressurized and depressurized slowly to avoid pressure shock.
• The wiring of the communication cable between the Precision digital pressure gauge alkc400T and the handheld device must be clearly identified to prevent reverse wiring.
• The readings of the verification points should be taken after the values on the standard meter have stabilized, and the records should be kept accurate in real time.
After the inspection is completed, slowly release the pressure to zero, ensure there is no residual pressure, and then turn off the equipment power supply before removing the inspected instrument.
Maintenance and calibration cycle
• Regularly conduct metrological verification on the precision digital pressure gauge ALKC400T (it is recommended to do so once a year) to ensure that the measurement accuracy meets the required standards.
• When the pressure gauge is not in use, the power should be turned off. If it is not used for a long time, it should be charged once every three months.
• If the air pressure bench is not to be used for a long period, it should be depressurized and stored, covered with a cloth to prevent dust from entering the instrument.
IV. Conclusion
The reliability of pressure transmitter measurement results is the prerequisite for precise regulation and control in industrial automation systems. Using the AILEIKE calibration equipment, we conduct full-range calibration for both positive and negative pressures, calibrating the instrument's zero point, measurement range, and 4~20mA current output item by item. The entire calibration process adheres to standardized operating procedures, and maintenance and care of the calibration equipment are carried out simultaneously. Regular instrument calibration is completed to continuously maintain the pressure measurement performance of the transmitter, ensuring accurate data collection and providing strong support for the stable operation of the entire automatic control system.
Related News