

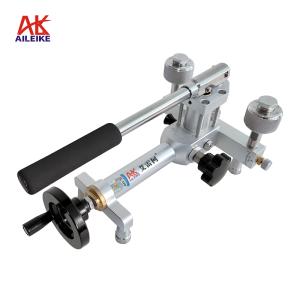
Operating Procedures for the Calibration, Testing and Measurement of Pressure Gauges Using the AILEIKE Hand-held Pneumatic Pump
Pressure gauges are the core instruments for industrial pressure monitoring; the accuracy of their readings is crucial to production operations and data reliability. Conducting pressure gauge calibration, testing and measurement in accordance with established standards is essential to ensuring the accurate traceability of measurement values and the compliance of instrument performance. This calibration utilised the ALKC400HA1 precision digital pressure gauge as the reference instrument, in conjunction with the AILEIKE102SA handheld air pump. Under compliant conditions, a point-by-point inspection was carried out across the full range by increasing and decreasing the pressure, and the procedure for gently tapping the case to stabilise the reading was followed to accurately measure the error in the reading of the gauge under test. Operations must involve smooth pressure control to avoid shocks, and the pressure must be released and reset to zero after calibration. Regular verification of standard instruments and equipment maintenance can safeguard long-term measurement accuracy, ensure that calibration results meet regulatory requirements, and provide a reliable basis for pressure measurement.
I. Pressure Gauge Calibration Tools
|
Name |
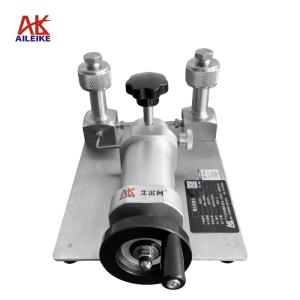
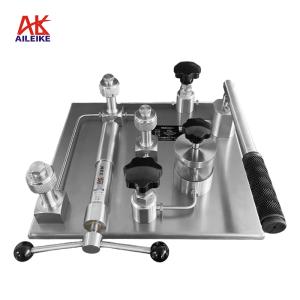
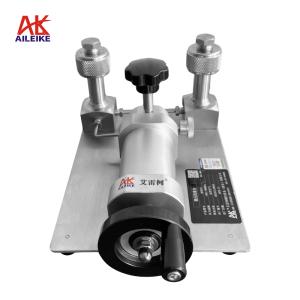
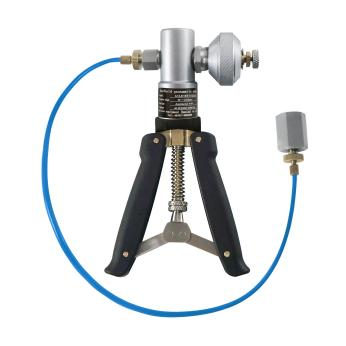
Hand-held air pump |
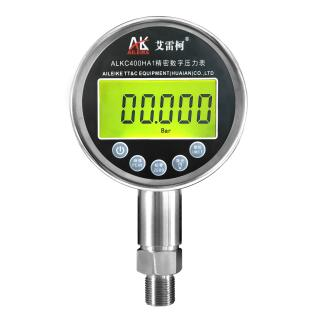
Precision Digital Pressure Gauge |
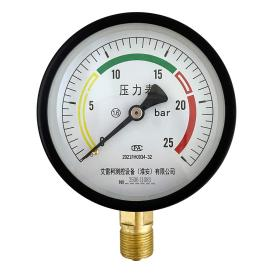
Pressure Gauges |
|
Model |
AILEIKE102SA |
ALKC400HA1 |
Various models |
|
Technical Specifications |
Pressurisation method: Manual Pressure range: 0–25 bar Medium: Clean air Outlets: 2 Connection: M20×1.5 (F) Net weight: 0.8 kg Product dimensions: 220×130×50 mm
|
Pressure: 0–25 bar Accuracy: Class 0.1 Power supply: Built-in maintenance-free lithium battery Connection: M20×1.5 (M) Net weight: 0.6 kg Dimensions: 110×50×185 mm
|
Pressure: 0–25 bar Accuracy: Class 1.6 Dial diameter: φ100 mm Connection: M20×1.5 male Net weight: 0.3 kg Product dimensions: 100×42×135 mm
|
|
Product Dimensions |
|
|
|
The entire verification process must be carried out in strict accordance with current metrological technical specifications. The main references include:JJG52-2013 ‘General Pressure Gauges, Pressure-Vacuum Gauges and Vacuum Gauges with Elastic Elements’, which applies to the initial verification, subsequent verification and in-service inspection of general pressure gauges, pressure-vacuum gauges and vacuum gauges with elastic elements, and covers on-site indicating pressure measuring instruments commonly used in industry.
II. Detailed Explanation of the Operational Process
(1) Preliminary Preparations
1. Environmental Requirements
The temperature must be maintained at (20±2) °C, with relative humidity ≤ 85% RH and no condensation. The site must be free from vibration, dust and corrosive gases.
2. Connecting the equipment
• Connect the standard gauge ALKC400HA1 to the output port for standard gauges on the AILEIKE102SA handheld air pressure pump.
• Connect the pressure gauge under test to the output port for gauges under test on the AILEIKE102SA handheld air pressure pump.
(2) Pressure Gauge Calibration Procedure
1. Pressure Build-up Procedure
• First, turn the AILEIKE102SA fine-adjustment knob anti-clockwise until it stops, then close the pressure relief valve.
• Apply pressure by hand using the pressure-application lever, stopping at a pressure level approximately equal to the calibration test point. Then use the fine-adjustment knob to set the pressure to 5 bar. Once the pressure has stabilised and the standard display reading no longer fluctuates, check the pressure reading on the pressure gauge under test. Next, gently tap the side of the pressure gauge’s casing with your finger (do not tap the glass or tap forcefully), observe the position of the pointer, and record the reading once it has stabilised after tapping. Use the reading after tapping as the actual calibration reading for that pressure point, and calculate the error.
• Continue to apply pressure by hand using the pressure-application lever, stopping at approximately the calibration point to be tested, then use the fine-adjustment knob to set the pressure to 10 bar at the calibration point. Once the pressure has stabilised, tap the pressure gauge under test and record the reading.
• Repeat the same procedure, increasing the pressure to the test points of 15 bar, 20 bar and 25 bar. Once the pressure has stabilised, tap the pressure gauge under test and record the reading.
2. Depressurisation process
• First, slowly open the relief valve to reduce the pressure to the test point, then close the relief valve. Use the fine-adjustment valve to set the pressure to the test point of 20 bar. Once the pressure has stabilised, tap the pressure gauge under test and record the reading.
• Repeat the same procedure to adjust the pressure to the test points of 15 bar, 10 bar and 5 bar. Observe the pressure reading on the pressure gauge under test, tap the gauge and record the reading once it has stabilised.
3. Depressurisation procedure
Open the relief valve and gradually release the pressure within the pipework until it reaches 0 bar, at which point the test is complete.
III. Precautions
Proper Use
• During calibration, ensure that the permissible error of the reference gauge is less than that of the gauge under test, to guarantee that the calibration results are accurate and reliable, and comply with metrological standards.
• Follow standard operating procedures; when using the AILEIKE 102SA hand-operated air pump to increase or decrease pressure, do so gradually to avoid pressure surges.
• Pressurise to the calibration point and record the reading once the reference gauge’s reading has stabilised; for the pressure gauge under test, once the pressure has stabilised, tap the case lightly; use the reading immediately after tapping as the final reading to ensure accuracy.
• Upon completion of the test, first slowly depressurise to zero; only remove the instrument under test once all residual pressure has been released.
Maintenance and Calibration Intervals
• Have the ALKC400HA1 precision digital pressure gauge metrologically verified at regular intervals (recommended once a year) to ensure measurement accuracy meets standards.
• When the pressure gauge is not in use, switch off the power supply; if not used for an extended period, cover it with a cloth cover to prevent dust from entering the instrument.
• If the handheld air pump is not used for an extended period, depressurise it before storage and cover it with a cloth cover to prevent dust from entering the instrument.
IV. Conclusion
The calibration, inspection and measurement of the pressure gauge have been successfully completed, and the indication errors across the full measurement range of the gauge under test have been established. Through point-by-point testing during both the pressure-increasing and pressure-reducing cycles, combined with standard operating procedures such as gently tapping the case to read the value and maintaining stable pressure control, measurement deviations can be effectively avoided, thereby ensuring the accuracy and reliability of the test data. By maintaining proper cleaning and storage of the equipment on a daily basis and carrying out periodic verification of standard pressure gauges, measurement accuracy can be sustained, and the long-term, standardised conduct of pressure gauge testing can be ensured, providing stable support for the reliable measurement of pressure parameters in various scenarios.
Related News