

How to calibrate the zero point of a pressure transmitter using the AILEIKE ALK475TREX (Chinese version) handheld programmer
How to calibrate the zero point of a pressure transmitter using the AILEIKE ALK475TREX (Chinese version) handheld programmer
Zero-point calibration of pressure transmitters (HART protocol) is the foundation of reliable industrial pressure measurement. The ALK475TREX (Chinese Version) handheld programmer supports both built-in 24V power supply and external power supply connection modes, enabling quick fine-tuning of the transmitter’s zero point. This article outlines the complete operational steps for device connection and zero-point calibration, providing clear and standardized practical guidance for on-site calibration.
I. Preliminary Preparations
Prepare one ALK475TREX (Chinese version) handheld programmer, one pressure transmitter (HART protocol), and a handheld programmer communication cable.
Connecting the Equipment
• Wiring Method 1 (The ALK475TREX handheld programmer has a built-in 24V power supply that can power the transmitter):
(1) First, plug the communication cable connector into the handheld communicator’s communication port (Note: Connect the positive terminal of the communication cable connector to the positive terminal of the handheld communicator’s communication port, and the negative terminal to the negative terminal), then turn on the 24V power supply.
(2) Clip the other end of the communication cable onto the transmitter: the red alligator clip on the transmitter’s positive terminal and the black alligator clip on the transmitter’s negative terminal.
(3) Once the wiring is complete, the handheld unit is successfully supplying power to the transmitter.
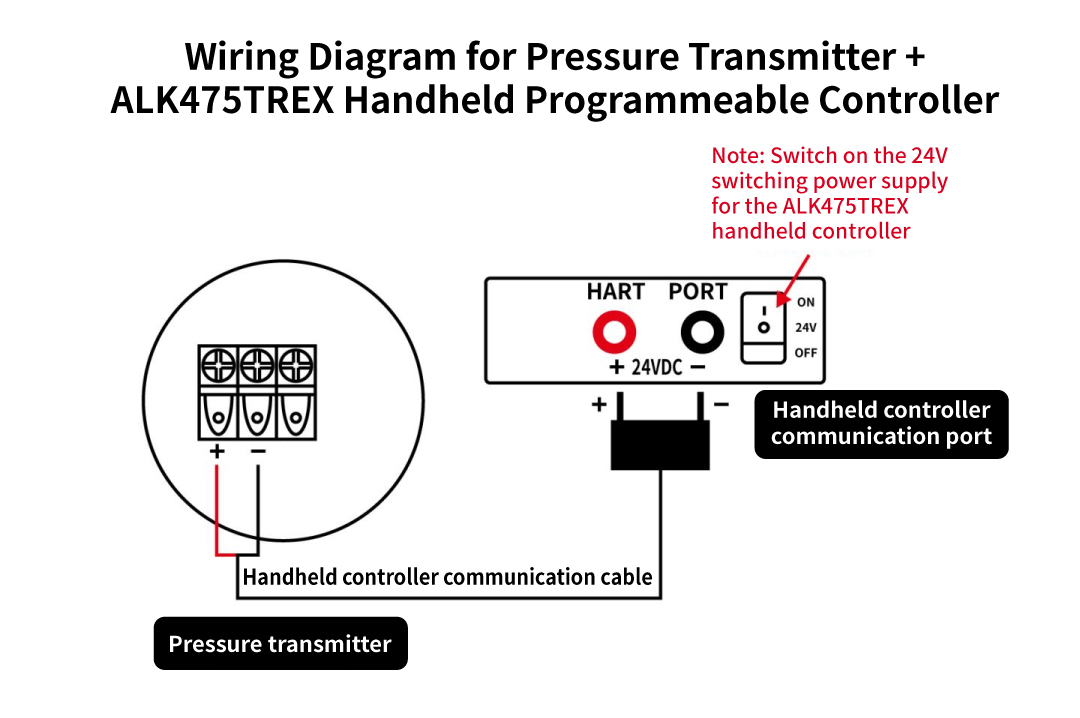
Wiring Diagram (1)
• Wiring Method 2 (ALK475TREX Handheld Unit with External Power Supply):
Additional items required: External 24V power cable, 250Ω resistor
(1) First, connect the positive terminal of the external 24V power cable to the positive terminal of the transmitter’s power supply, then connect the 250Ω resistor to the negative terminal of the transmitter
(3) Connect the negative terminal of the external 24V power cable to the other end of the 250Ω resistor
(3) Insert the communication cable connector into the handheld unit’s communication port (Note: Connect the positive terminal of the communication cable connector to the positive terminal of the handheld unit’s communication port, and the negative terminal to the negative terminal). Clip the other two alligator clips onto either side of the 250Ω resistor
(4) Finally, turn on the external 24V power supply. Once all devices are successfully connected, take out the handheld unit and turn it on; you will see that the handheld unit and the pressure transmitter have successfully established communication.
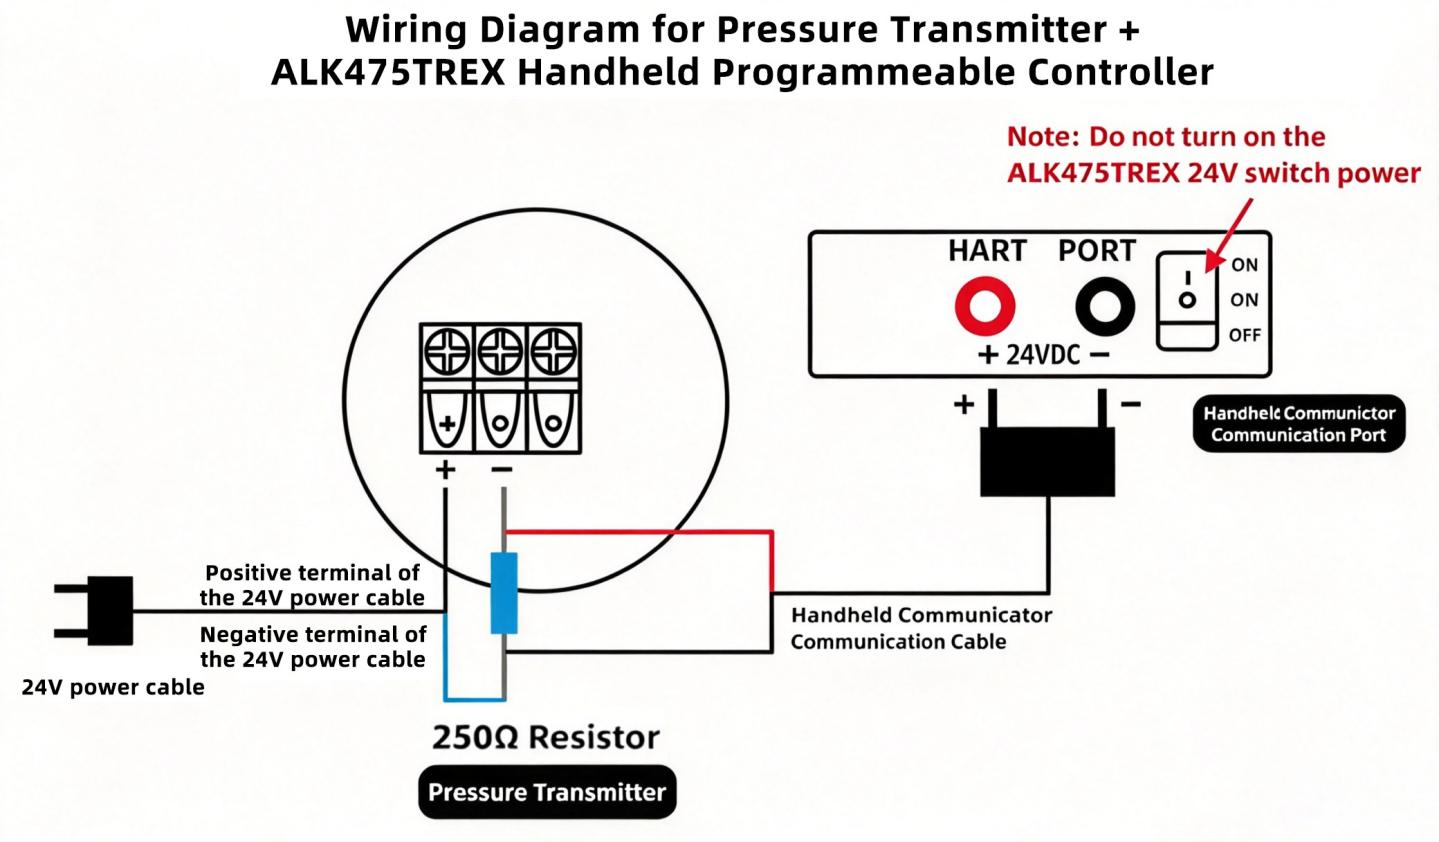
Wiring Diagram (2)
• If the pressure transmitter does not display zero when open to atmospheric pressure, use the HART handheld communicator to calibrate the transmitter’s zero point.
II. Zero Calibration Procedure
With the HART handheld communicator and the pressure transmitter already successfully communicating, follow these steps:
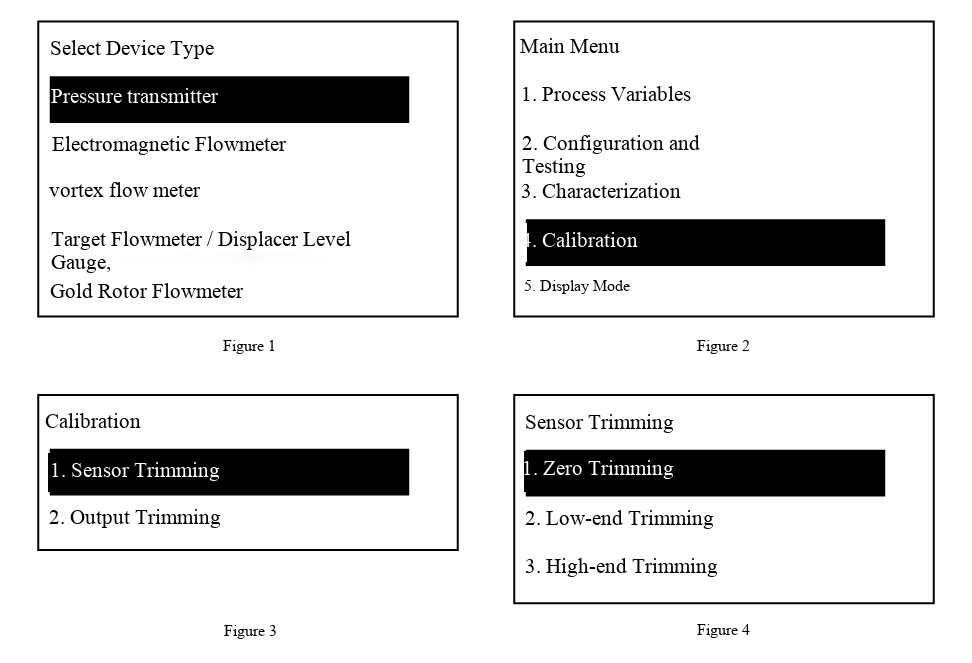
1. Select the pressure transmitter (see Figure 1)
2. Press the right button to enter the pressure transmitter interface
3. Press the down arrow key to select “Calibration” (see Figure 2)
4. Press the right button to enter the calibration interface
5. Select “Sensor Fine-Tuning” (see Figure 3)
6. Press the right button to enter the sensor fine-tuning interface
7. Select “Zero Adjustment” (see Figure 4)
8. Press the right button to confirm; the pressure transmitter’s zero-point calibration is complete
Related News